Windows IPv6可能会因为获取到v6的DHCP消息而记录下网络环境的IPv6 DNS服务器地址而导致注册表残留。
可以在注册表路径
计算机\HKEY_LOCAL_MACHINE\SYSTEM\CurrentControlSet\Services\Tcpip6\Parameters\Interfaces\
看到“UUID类似物”命名的目录
其中包含了Dhcpv6DNSServers的子项,将其删除即可。
随后Windows将会遵循RA公告的DNS服务器。
Windows IPv6可能会因为获取到v6的DHCP消息而记录下网络环境的IPv6 DNS服务器地址而导致注册表残留。
可以在注册表路径
计算机\HKEY_LOCAL_MACHINE\SYSTEM\CurrentControlSet\Services\Tcpip6\Parameters\Interfaces\
看到“UUID类似物”命名的目录
其中包含了Dhcpv6DNSServers的子项,将其删除即可。
随后Windows将会遵循RA公告的DNS服务器。
由于我可能要批量安装一批边缘盒子,所以,我希望在自动化安装系统后,尽量通过离线.deb包的形式安装桌面环境(ubuntu-desktop-minimal)和firefox。
假设有两台机器,第一台叫做“联网机”,第二台叫做“离线机”。我在联网机上配置了国内的apt源,并经过了漫长等待(是的,哪怕国内源,下载也要很长时间),成功安装了ubuntu-desktop-minimal和firefox。经过一番探索和验证,我得出了以下方案。
在“联网机”上下载好所有.deb包(包含完整依赖),打包后通过 HTTP 分享,另一台离线机器使用脚本下载、解压并安装这些.deb包。
安装所需软件(会自动缓存 .deb)
sudo apt update
sudo apt install ubuntu-desktop-minimal firefox
检查.deb包是否缓存
ls -l /var/cache/apt/archives/
把这些.deb包复制并打包
mkdir -p ~/offline-debs
cp /var/cache/apt/archives/*.deb ~/offline-debs/
cd ~
tar -czf offline-debs.tar.gz offline-debs/
编写安装脚本 install.sh
#!/bin/bash
set -e

# Step 1: 下载并解压
URL="http://192.168.31.47:8080/offline-debs.tar.gz"
TAR_FILE="/tmp/offline-debs.tar.gz"
DEST_DIR="/tmp/offline-debs"

echo "Downloading package archive..."
wget -O "$TAR_FILE" "$URL"

echo "Extracting to $DEST_DIR..."
rm -rf "$DEST_DIR"
mkdir -p "$DEST_DIR"
tar -xzf "$TAR_FILE" -C "$DEST_DIR"

DEB_DIR=$(find "$DEST_DIR" -type d -name "offline-debs" | head -n 1)
if [[ -z "$DEB_DIR" ]]; then
    echo "Error: .deb directory not found."
    exit 1
fi

# Step 2: 写入临时 TUNA 源(不影响主配置)
echo "Adding temporary TUNA source..."
cat <<EOF | sudo tee /etc/apt/sources.list.d/temp-tuna.sources > /dev/null
Types: deb
URIs: https://mirrors.tuna.tsinghua.edu.cn/ubuntu
Suites: noble noble-updates noble-backports
Components: main restricted universe multiverse
Signed-By: /usr/share/keyrings/ubuntu-archive-keyring.gpg
EOF

# Step 3: 更新 apt 缓存
echo "Running apt update..."
sudo apt update

# Step 4: 安装
echo "Installing packages from local .deb and remote source if needed..."
cd /tmp/offline-debs/offline-debs/
sudo apt install -y ./*.deb
sudo apt install -y ubuntu-desktop-minimal

# Step 5: 清理临时源
echo "Cleaning up temporary source..."
sudo rm /etc/apt/sources.list.d/temp-tuna.sources
sudo apt update

# Step 6: 设置桌面为默认
echo "Setting Graphicall desktop as default"
systemctl set-default graphical.target

echo "Installation complete."将以上的offline-debs.tar.gz文件包和install.sh脚本放在合适的目录下,并在此处运行
python3 -m http.server 8080
在“离线机”上获取脚本并安装
wget http://192.168.31.47:8080/install.sh
bash install.sh
等待脚本运行完成后,如果希望开机默认进入桌面环境,需要执行
systemctl set-default graphical.target
仅针对Ubuntu Server,而非Ubuntu Desktop
自Ubuntu 20.04开始,自动安装部署将使用subiquity的user-data方式,不再支持18.04和更早版本的pre-seed。
Autoinstall的‘user-data’唯一官方参考是https://ubuntu.com/server/docs/install/autoinstall-reference
制作前需要安装以下工具
sudo apt install p7zipsudo apt install xorrisomkdir source-files
cp <path_to>/ubuntu-24.04.2-live-server-amd64.iso ubuntu-24.04.2-live-server-amd64.iso解压镜像
7z -y x ubuntu-24.04.2-live-server-amd64.iso -osource-filessource-files目录中会有一个 ‘[BOOT]’,包含了 1-Boot-NoEmul.img 2-Boot-NoEmul.img
这两个就是MBR引导和EFI引导分区的镜像。我们不需要把它们打包进ISO,所以把它们移到上层目录
mv '[BOOT]' ../BOOT编辑 boot/grub/grub.cfg
在所有menuentry前添加一块menuentry配置
menuentry "Autoinstall Ubuntu Server" {
        set gfxpayload=keep
        linux   /casper/vmlinuz quiet autoinstall ds=nocloud\;s=/cdrom/nocloud/  ---
        initrd  /casper/initrd
}
可以理解为复制了”Try or Install Ubuntu Server”这个menuentry,并在linux行增加了autoinstall。指定了ds (data source)为nocloud,source路径为/cdrom/nocloud/。注意需要\(反斜杠)来转义,以保留;(分号)。
最后可能会得到像下图所示的结构

创建nocloud目录用于存放user-data和meta-data
mkdir source-files/nocloud由于cloud-init依赖meta-data,即使我们用不到它,也必须要创建一个空文件
touch source-files/nocloud/meta-data创建并编辑user-data
vim source-files/nocloud/user-data以下是一个user-data的示例
#cloud-config
autoinstall:
  version: 1
  locale: en_US.UTF-8
  keyboard:
    layout: us
  identity:
    hostname: supos-ce-edge
    username: supos
    password: $6$LartesJok7i1zS9a$K5K70Sf/ZyIdPQw8fRSaHTKAfEJ1cftHurcgTAZS98IzYv/zq64mfgg53E98rmwdy6zaTQa4W0u8hD.6hvEWn. #可以用 openssl passwd -6 YourPassword 来生成
  ssh:
    allow-pw: true
    install-server: true
  apt:
    preserve_sources_list: true
    geoip: true
    fallback: offline-install
  storage:
    layout:
      name: direct
  packages:
    - vim
    - curl
    - wget
    - net-tools
  late-commands:
    - curtin in-target -- apt-get -y purge unattended-upgrades  #安装完成后,卸载我不喜欢的 unattended-upgrades
安装系统过程中安装的软件包会直接从公网上拉取(暂时没有找到可以从ISO本地直接安装的方式),所以不建议安装太多,更不建议安装ubunt-desktop这样的大包。如果有需要,建议进入系统后配置APT源再安装。
xorriso -indev ubuntu-24.04.2-live-server-amd64.iso -report_el_torito as_mkisofs使用xorriso命令查看原镜像的信息
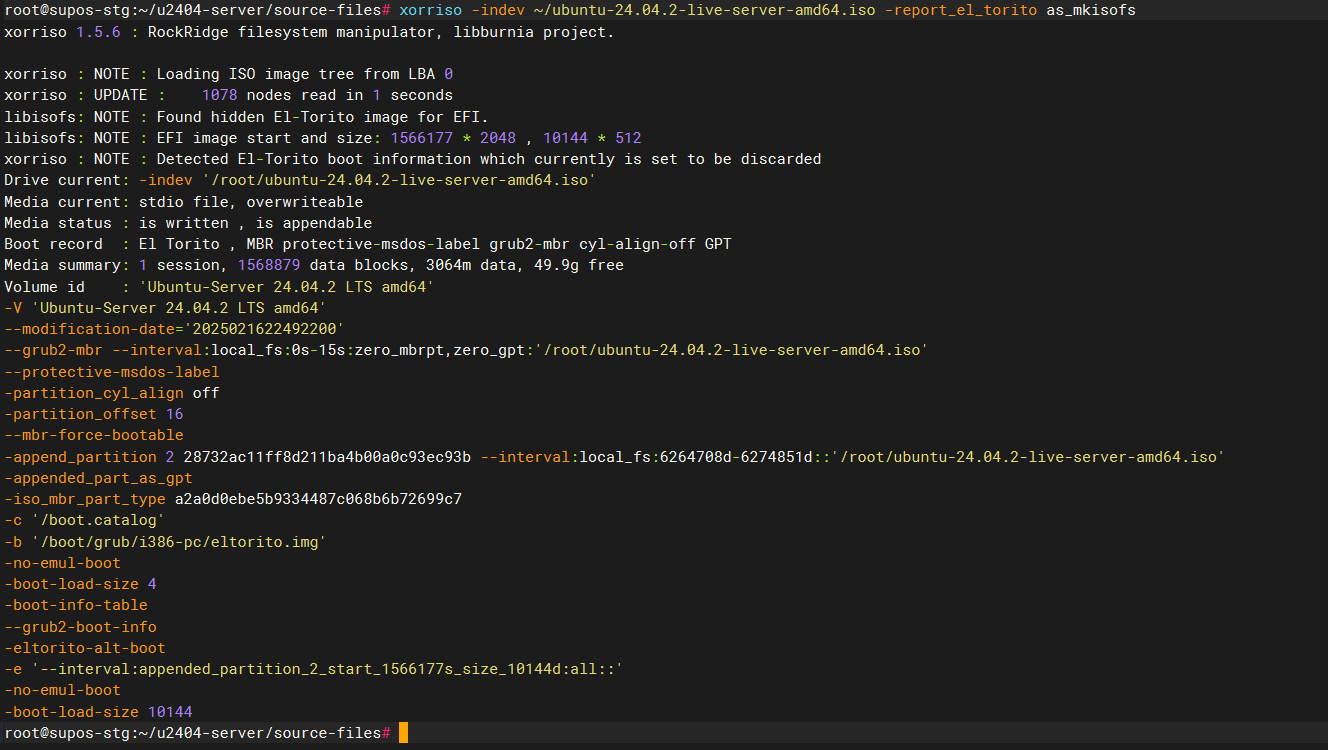
提取关键信息,并替换到以下命令中
cd source-files

xorriso -as mkisofs -r \
  -V 'Ubuntu Server 24.04.2 auto' \
  -o ../ubuntu-24.04.2-live-server-amd64-autoinstall.iso \
  --grub2-mbr ../BOOT/1-Boot-NoEmul.img \
  -partition_offset 16 \
  --mbr-force-bootable \
  -append_partition 2 28732ac11ff8d211ba4b00a0c93ec93b ../BOOT/2-Boot-NoEmul.img \
  -appended_part_as_gpt \
  -iso_mbr_part_type a2a0d0ebe5b9334487c068b6b72699c7 \
  -c '/boot.catalog' \
  -b '/boot/grub/i386-pc/eltorito.img' \
    -no-emul-boot -boot-load-size 4 -boot-info-table --grub2-boot-info \
  -eltorito-alt-boot \
  -e '--interval:appended_partition_2:::' \
  -no-emul-boot \
  ./
随后会在 source-files 的上级目录得到ubuntu-24.04.2-live-server-amd64-autoinstall.iso
同事开发的app,部署到aliyun上的单机版supOS后无法正常运行,初步排查发现是pod内DNS问题,无法解析外部域名,但是在ECS实例层我们可以正常解析。Alpine Linux镜像带有apk包管理工具,但是又因为DNS问题,无法从公网拉取软件包,所以需要离线安装apk包。
后续:根因是阿里云的region级DNS服务器100.100.2.136和100.100.2.138处于100.64.0.0/10网段,和supOS默认的POD_CIDR重叠。
cat /etc/os-release
如图,可以得知是Alpine Linux v3.7
务必保证Alpine Linux版本一致,否则软件的依赖关系可能会有变化
apk add tcpdump可以安装tcpdump同时观察到依赖包的版本和安装顺序

可以看到先安装了libpcap,随后安装了tcpdump
apk fetch tcpdump 和apk fetch libpcap将apk包下载保存到容器中
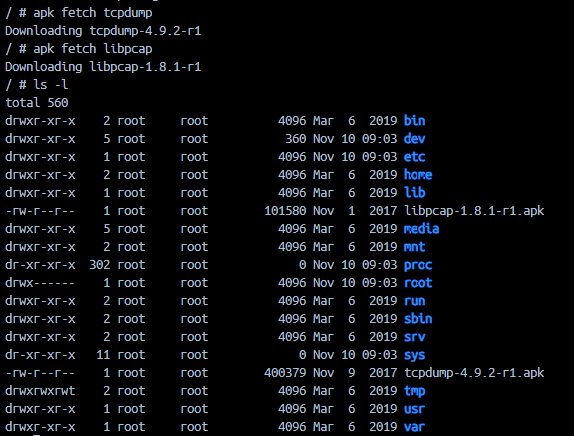

比如用python3 -m http.server 18888起一个简单的服务器,然后从pod内wget下载


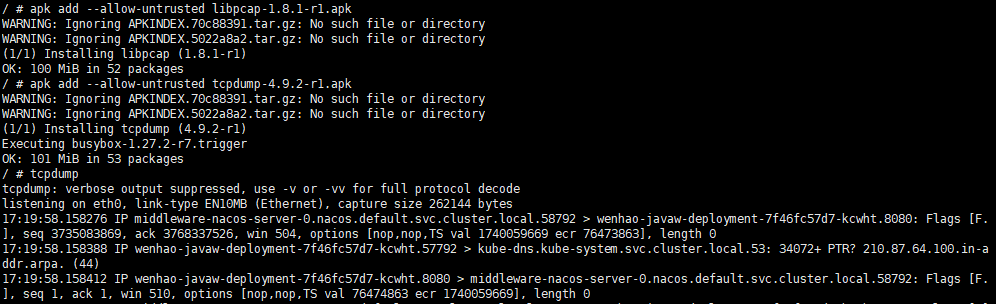
apk add --allow-untrusted <path_to_package>安装后即可运行tcpdump。注意,需要注意安装的先后次序。具体次序参步骤3中包被安装的顺序。
To create an EMQX cluster to provide MQTT service and keep it as simple as much, we can do it with docker and docker-compose only.
Create /volumes/emqx-data/ on each node for persistent storage of configuration. Make sure to give write permissions.
On the first node (192.168.31.61), create a docker-compose.yaml file with content below
version: '3'

services:
  emqx1:
    image: emqx:5.5.0
    container_name: emqx1
    environment:
    - "EMQX_NAME=emqx1"
    - "EMQX_HOST=192.168.31.61"
    - "EMQX_NODE_NAME=emqx1@192.168.31.61"
    - "EMQX_CLUSTER__DISCOVERY_STRATEGY=static"
    - "EMQX_CLUSTER__STATIC__SEEDS=[emqx1@192.168.31.61,emqx2@192.168.31.62,emqx3@192.168.31.63]"
    network_mode: "host"
    healthcheck:
      test: ["CMD", "/opt/emqx/bin/emqx_ctl", "status"]
      interval: 5s
      timeout: 25s
      retries: 5
    volumes:
      - /volumes/emqx-data/emqx1_data:/opt/emqx/data
On the second node (192.168.31.62), create a similar docker-compose.yaml file with content below
version: '3'

services:
  emqx1:
    image: emqx:5.5.0
    container_name: emqx2
    environment:
    - "EMQX_NAME=emqx2"
    - "EMQX_HOST=192.168.31.62"
    - "EMQX_NODE_NAME=emqx2@192.168.31.62"
    - "EMQX_CLUSTER__DISCOVERY_STRATEGY=static"
    - "EMQX_CLUSTER__STATIC__SEEDS=[emqx1@192.168.31.61,emqx2@192.168.31.62,emqx3@192.168.31.63]"
    network_mode: "host"
    healthcheck:
      test: ["CMD", "/opt/emqx/bin/emqx_ctl", "status"]
      interval: 5s
      timeout: 25s
      retries: 5
    volumes:
      - /volumes/emqx-data/emqx2_data:/opt/emqx/data
On the third node (192.168.31.63), similarly
version: '3'

services:
  emqx1:
    image: emqx:5.5.0
    container_name: emqx3
    environment:
    - "EMQX_NAME=emqx3"
    - "EMQX_HOST=192.168.31.63"
    - "EMQX_NODE_NAME=emqx3@192.168.31.63"
    - "EMQX_CLUSTER__DISCOVERY_STRATEGY=static"
    - "EMQX_CLUSTER__STATIC__SEEDS=[emqx1@192.168.31.61,emqx2@192.168.31.62,emqx3@192.168.31.63]"
    network_mode: "host"
    healthcheck:
      test: ["CMD", "/opt/emqx/bin/emqx_ctl", "status"]
      interval: 5s
      timeout: 25s
      retries: 5
    volumes:
      - /volumes/emqx-data/emqx3_data:/opt/emqx/data
Enter the folder where the docker-compose.yaml file is located, execute docker compose up -d

If nothing goes wrong, you should be able to see a running container with STATUS as healthy.

By visiting the webpage http://192.168.31.61:18083 (default credentials: admin/public), you should be able to see 3 nodes in cluster.
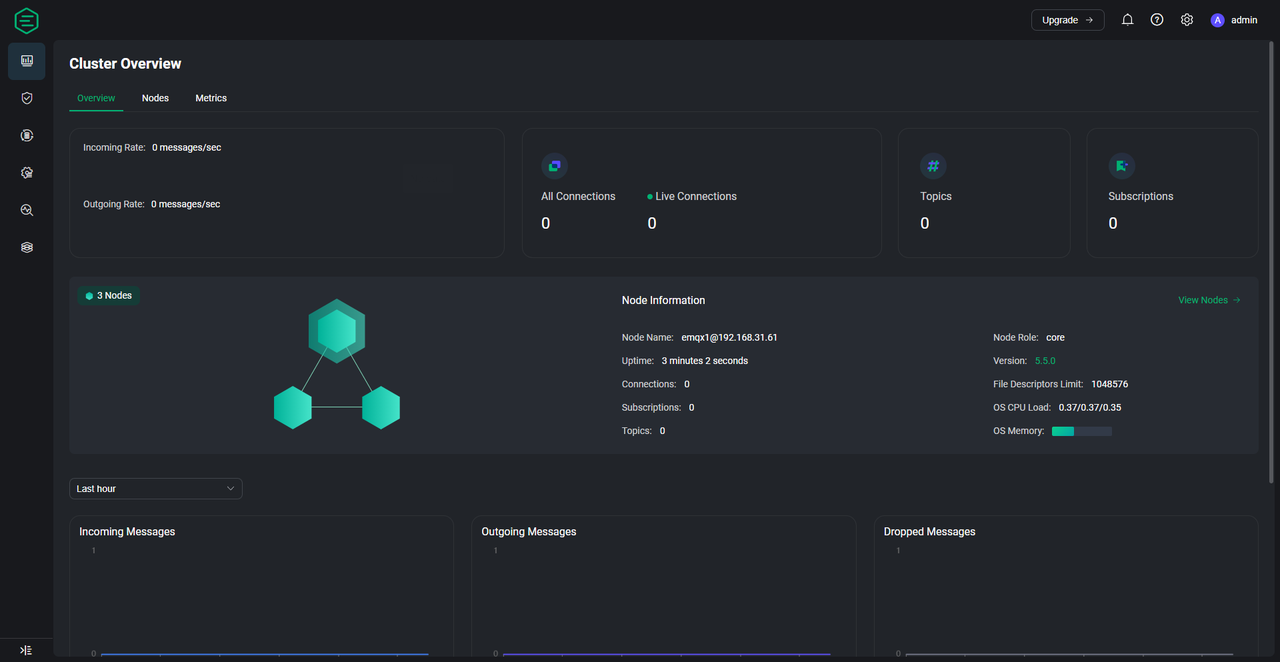
If you need high-availability, you should carry on deploying nginx or HAProxy, or alternatively, utilize load balancers on cloud to distribute traffic to ports on these EMQX nodes.
1. 所有节点安装软件
apt install pacemaker corosync pcs
2. 关闭防火墙
ufw disable
3. 所有节点启动pcsd
systemctl enable –now pcsd
4. 所有节点为hacluster用户设置密码为supos
echo “hacluster:supos” |chpasswd hacluster
5. 所有节点编辑/etc/hosts,设置IP和hostname映射关系,比如
| 192.168.31.201 supos-nfs1 192.168.31.202 supos-nfs2 |
6. 编辑/etc/corosync/corosync.conf
7. 在一个节点上操作节点间认证
pcs host auth supos-nfs1 addr=192.168.31.201 supos-nfs2 addr=192.168.31.202 -u hacluster
addr= 用来指定节点IP
-u 指定使用的用户名为hacluster

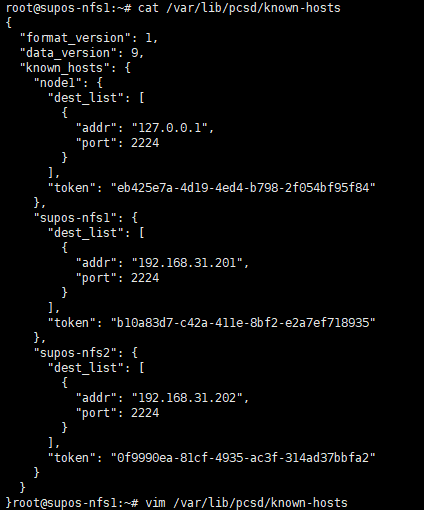
可能会有图中的报错Error: Unable to synchronize and save known-hosts on nodes: supos-nfs2. 建议检查本地/var/lib/pcsd/known-hosts文件,确保其中包含了集群内所有节点,并且都有token。然后,将这个文件复制到集群内其他节点上,以保证互相认证的成功。
/var/lib/pcsd/known-hosts文件内容可能如下
8. 在一个节点上操作组建集群
| 不同的pcs可能会在组建集群的时候有不同的命令语法,比如是否通过–name指定集群名称等。 pcs –version获取到版本信息,此次使用的是0.10.4 |
pcs cluster setup –force nfs-cluster supos-nfs1 addr=192.168.31.201 supos-nfs2 addr=192.168.31.202
此处使用的pcs,在setup命令后面的紧接的是集群名,老版本是通过–name指定的。大致格式如下
pcs cluster setup <cluster_name> <node_1_hostname> addr=<node_1_IP> <node_2_hostname> addr=<node_2_IP>
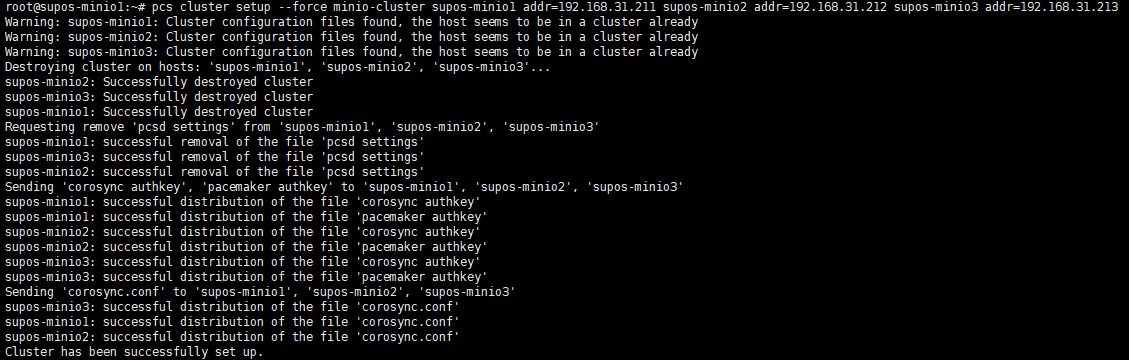
| 如果遇到下图无法解析known-hosts文件的报错,可以尝试pcs cluster destroy命令,然后再创建集群 |

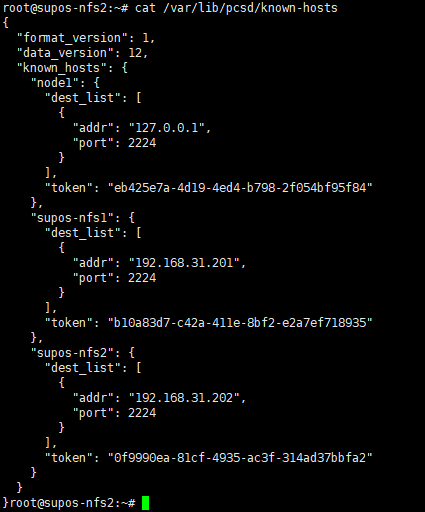
如果集群被正确组建,那么在其他节点上可以看到同步过来的/etc/corosync/corosync.conf和/var/lib/pcsd/known-hosts
内容应该如下,包含了所有node信息

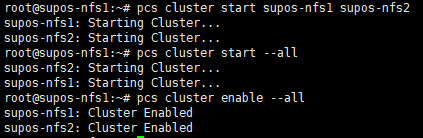
9. 在一个节点上启动集群内所有节点
pcs cluster start –all
并设置服务开机自启
pcs cluster enable –all
10. 检查集群状态
pcs status
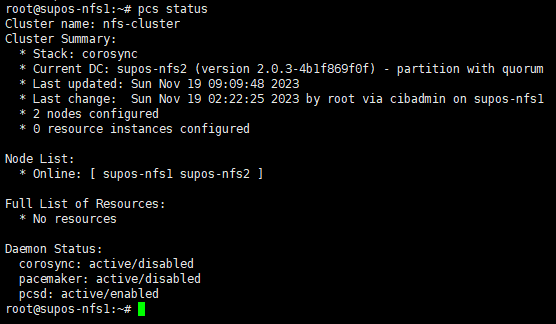
Node List中,所有节点均应处于Online状态
11. 设置集群属性(具体作用未知,待研究)
pcs property set stonith-enabled=false
pcs property set no-quorum-policy=ignore
12. 创建IPaddr2类型的浮动IP资源
pcs resource create floating_ip ocf:heartbeat:IPaddr2 ip=192.168.31.200 cidr_netmask=24 op monitor interval=10s
13. 将资源绑定到nfs-cluster
crm configure group nfs-cluster floating_ip
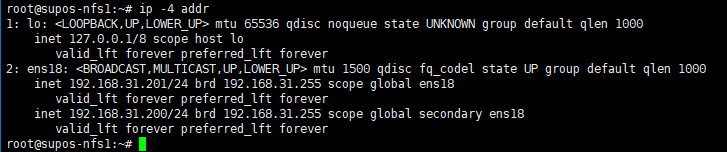
pcs status resources查看
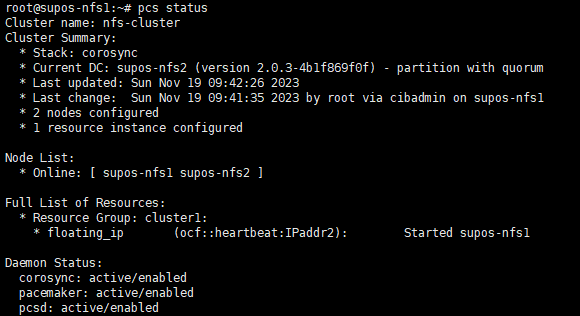
此时,应该可以在一台上看到此浮动IP。执行ip -4 addr 可以看到192.168.31.200的IP地址。
测试资源(VIP)是否可以成功漂移到其他节点
pcs resource move floating_ip supos-nfs2
由于我作(zuō),重新刷了Raspberry Pi Zero W的系统,所以原来的lighttpd配置需要恢复。但恢复不是简单地把配置文件一覆盖就好了(覆盖完发现访问不符合预期)。折腾了两天时间才搞定,所以记录一下,以备下次再作(zuō)或者手痒。
先说希望实现的效果:使用一个lighttpd进程,同时提供 AriaNg的页面 和 展示/mnt/目录下的文件(文件服务器),即
访问<host>:80 可以打开 AriaNg页面
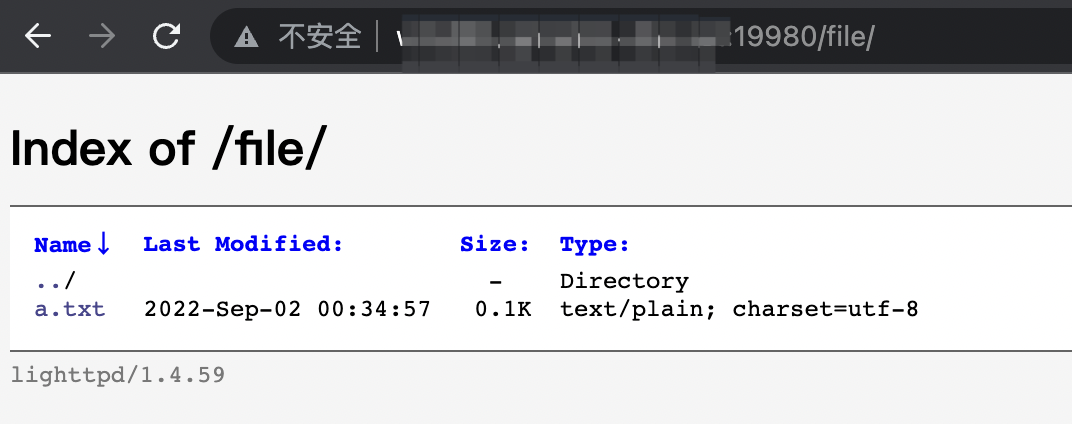
访问<host>:80/file 可以打开 文件服务器
第一个简单,下载最新的AriaNg,解压缩放到server.document-root下即可。
第二个原配置文件中有一段
$HTTP[“url”] =~ “^/file” {
server.document-root = “/mnt/”
dir-listing.activate = “enable”
}

依旧能清楚地记得当初调试这一段时学到的一些东西,
=~ 表示perl式正则匹配……
^/file表示以/file开头
参考原配置,在/etc/lighttpd/conf-enabled/目录下创建了10-dir-listing.conf的软连接,用于开启目录下文件列举

此时访问<host>:80/file却报错404,百思不得其解。$HTTP["url"] =~ "^/file" 这个条件时当时调了好久才调对的呀……我拷贝配置文件过来没改过呀……
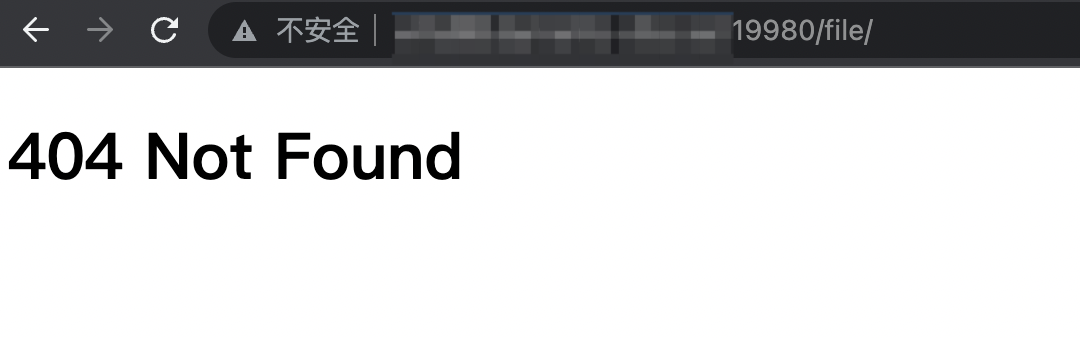
accesslog和errorlog几乎没有日志……
最后不知道为啥搜到了debug开关,https://redmine.lighttpd.net/projects/lighttpd/wiki/Debugvariables
主配置文件中增加一行
debug.log-request-handling = "enable" 然后访问的时候看到了访问/file会导致lighttpd读取/mnt/file目录……
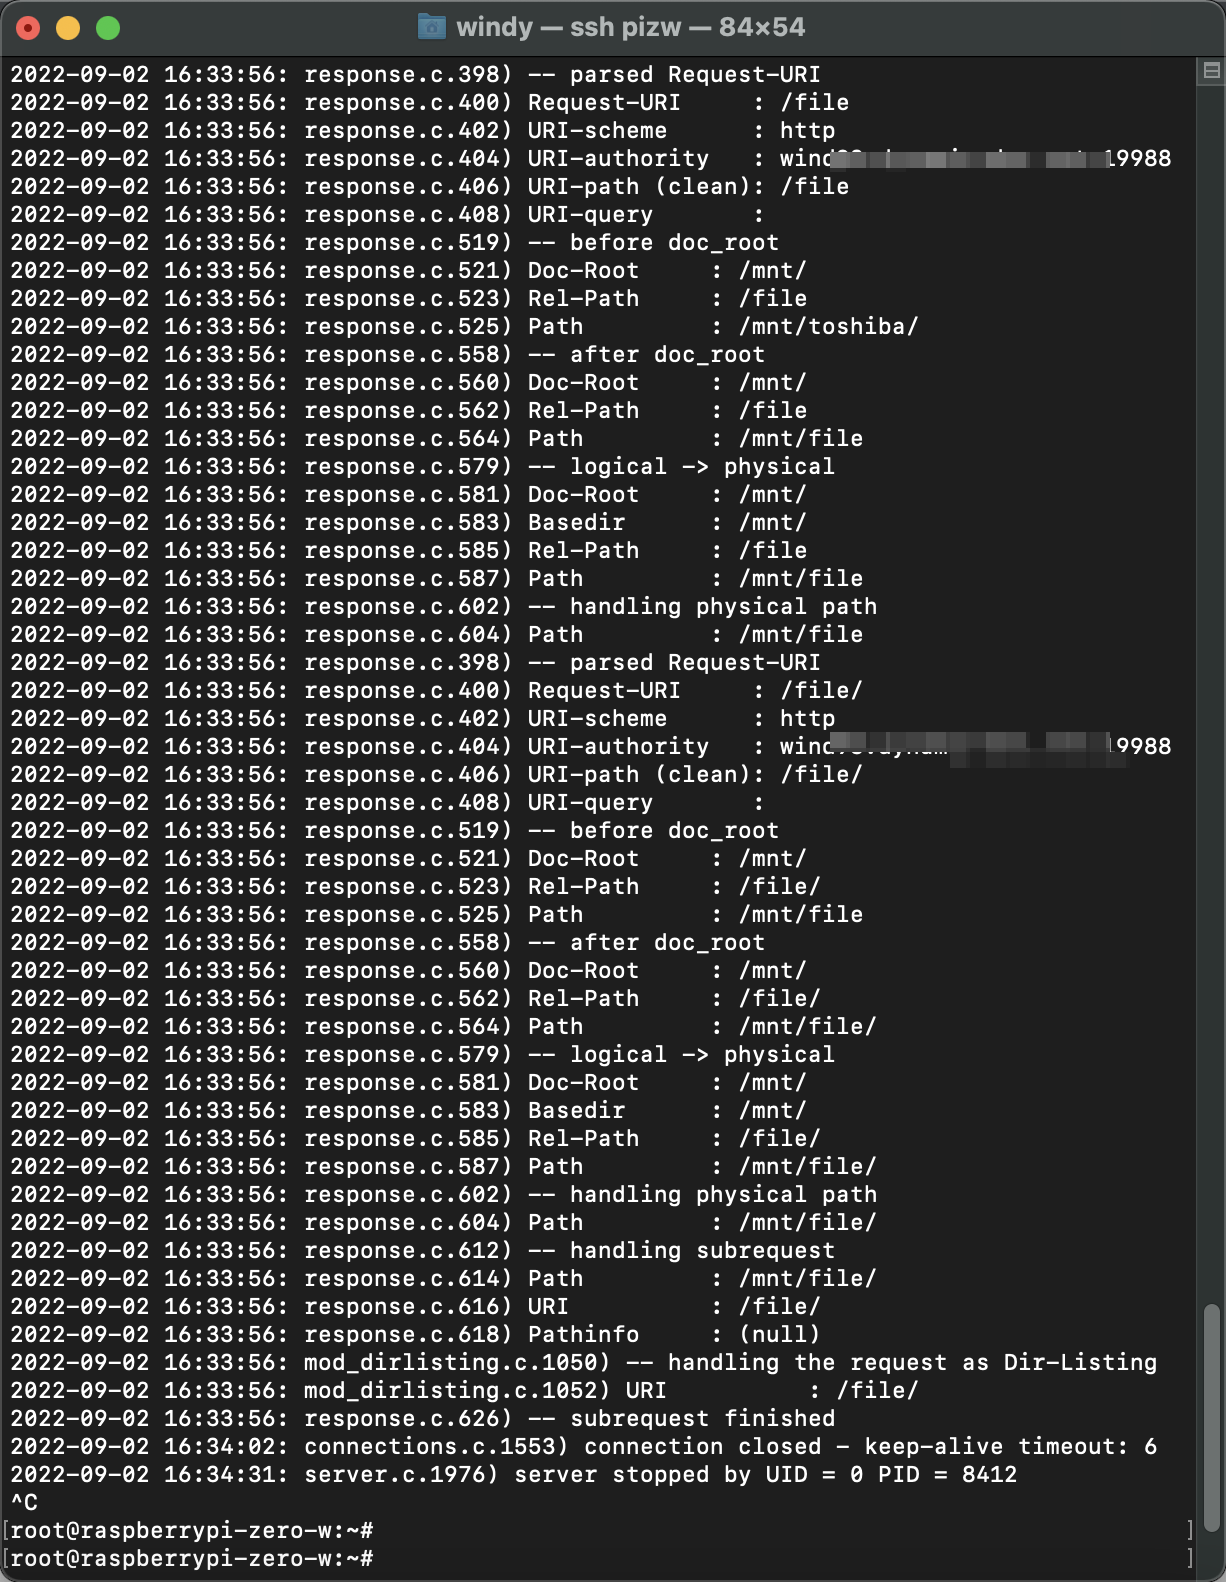
于是在/mnt/目录下创建了一个file的软连接,指向/mnt/toshiba后,就解决了这个问题


首次打开TeamSpeak 3会再次提示软件使用条款,同样需要拖动到最底部,然后才能选择”I accept”。
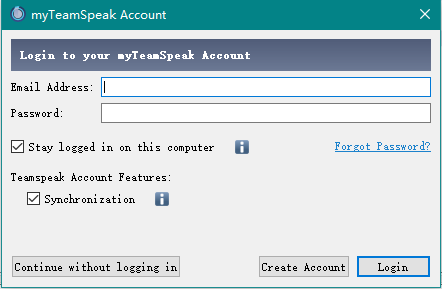
另外一个事情就是可能会碰到这个提示,这是连接TeamSpeak官方的myTeamSpeak服务,可以选择“Continue without logging in”跳过。
以上是未安装中文翻译包的截图,这时候可以在右下角找到图标,右击 – Quit 退出程序。
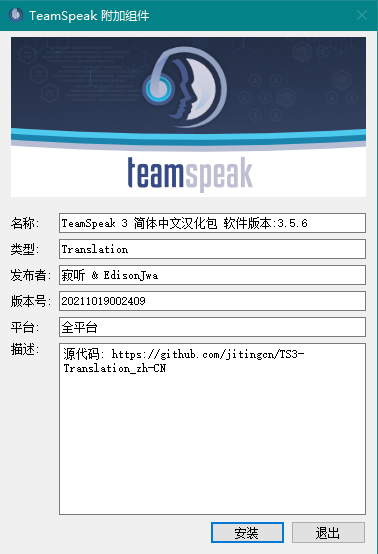
然后双击打开Chinese_Translation_zh-CN.ts3_translation 安装翻译
再次打开就是中文版的界面了

点击 连接 – 连接服务器
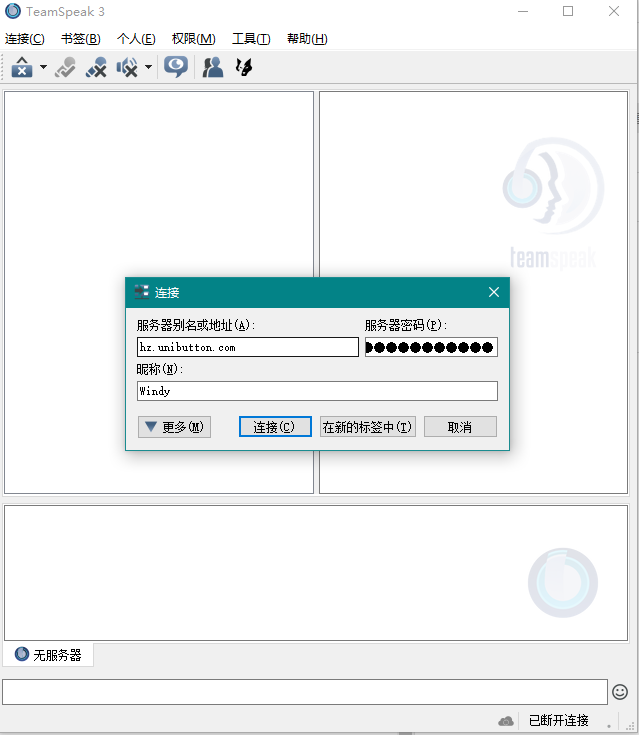
服务器别名或地址中输入 office.unibutton.com,密码群内交流,给自己取一个别人看得懂的昵称就可以连进Windy的树洞了。
下载页 https://www.teamspeak.com/zh-CN/downloads/
或者直接点击下面这个链接下载当前最新版本3.5.6
https://files.teamspeak-services.com/releases/client/3.6.2/TeamSpeak3-Client-win64-3.6.2.exe
如果下载有困难,可以从我的服务器下载 https://windywind.tk:8080/TeamSpeak3-Client-win64-3.6.2.exe
如果下载有困难,可以从我的服务器下载 https://windywind.tk:8080/Chinese_Translation_zh-CN.ts3_translation
打开TeamSpeak3-Client-win64-3.5.6.exe完成安装,并启动一次
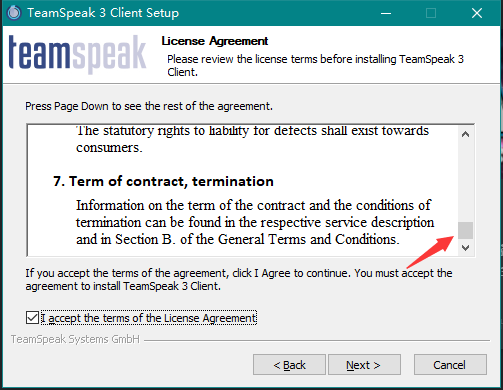
安装过程中,在许可页面需要拖到最下面,然后才能够选接受协议
双击打开Chinese_Translation_zh-CN.ts3_translation安装
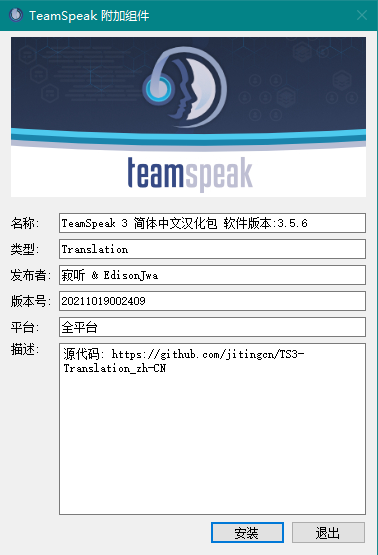
然后再次启动TeamSpeak就应该是简体中文界面了
重点是避坑和坑!
原来收藏过一篇用树莓派+Python+OpenCV实现监控和动作检测的中文翻译文章,原文和译文写得可读性都很不错。可惜原文已经404了,只好找了两个转载的当备份
https://blog.ggrarea.cn/archives/1807.html
以及
其中的完整Python代码可以在
https://gist.github.com/vishvanand/60afc7b998d885df66e9c4f07cf57ab0
获得(代码和原文有区别,请直接到原文复制代码吧)
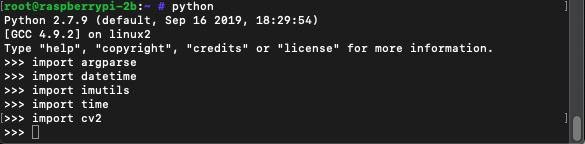
想起来搞这个是因为最近想学点新的东西,又想利用把吃灰的树莓派2B利用起来,就去买了摄像头。
然后就开始了不断的踩坑和填坑……&(%&……¥%%……¥%……
参照文档第一步pip install imutils和pip install opencv-python就失败了,树莓派上的pip太老了,要升级。但是pip install pip -U的方式自升级也不能成功。通过apt卸载再安装也依旧是之前的pip版本。
最后的成功的方案是apt remove python-pip卸载,然后通过官方get-pip.py脚本安装成功。这中间又碰到了系统中ca-bundle太老,不能信任很多服务端证书的问题。
最后使用pip install --trusted-host pypi.tuna.tsinghua.edu.cn opencv-python的方式可以信任证书(这个方式适用于版本 >= 20.x 的pip。另外,这里–trusted-host后面跟的是已配置的pypi源地址)
事情还没完,你以为pip install --trusted-host pypi.tuna.tsinghua.edu.cn opencv-python就能成功安装opencv了吗?那你就too young了。
有一个事情是NumPy(OpenCV的依赖包)停止了对Python 2.x的支持,要安装也得用pip3 install opencv-python。
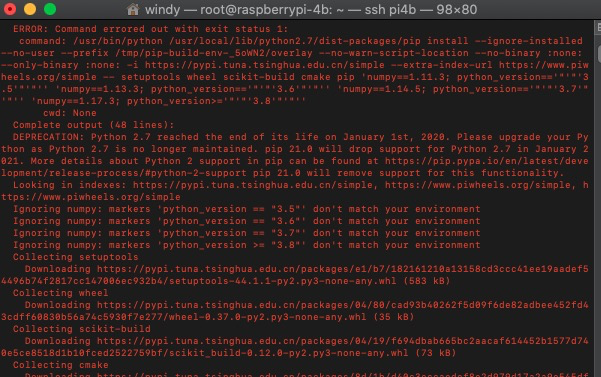
再看看这编译日志,抠脚想象树莓派2B的性能(等了半天,我想连上4B去安装试试,结果后开始的4B进度比2B快,先跳Installing build dependencies
无意间看到有另外一个方法可以安装OpenCV,就是通过apt-get install python-opencv,结果秒秒钟完成……
进入交互式的Python CLI,执行前面几个import都不报错了,差点哭了……