1. 所有节点安装软件
apt install pacemaker corosync pcs
2. 关闭防火墙
ufw disable
3. 所有节点启动pcsd
systemctl enable –now pcsd
4. 所有节点为hacluster用户设置密码为supos
echo “hacluster:supos” |chpasswd hacluster
5. 所有节点编辑/etc/hosts,设置IP和hostname映射关系,比如
| 192.168.31.201 supos-nfs1 192.168.31.202 supos-nfs2 |
6. 编辑/etc/corosync/corosync.conf
7. 在一个节点上操作节点间认证
pcs host auth supos-nfs1 addr=192.168.31.201 supos-nfs2 addr=192.168.31.202 -u hacluster
addr= 用来指定节点IP
-u 指定使用的用户名为hacluster

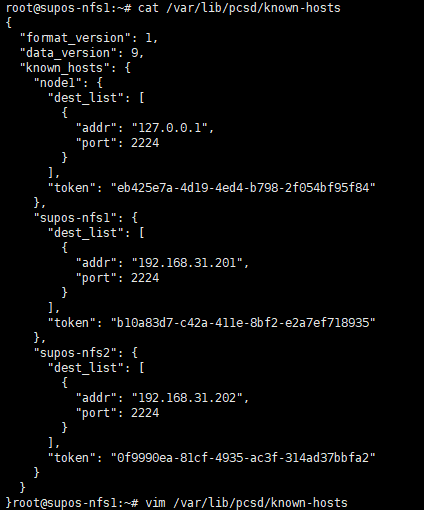
可能会有图中的报错Error: Unable to synchronize and save known-hosts on nodes: supos-nfs2. 建议检查本地/var/lib/pcsd/known-hosts文件,确保其中包含了集群内所有节点,并且都有token。然后,将这个文件复制到集群内其他节点上,以保证互相认证的成功。
/var/lib/pcsd/known-hosts文件内容可能如下
8. 在一个节点上操作组建集群
| 不同的pcs可能会在组建集群的时候有不同的命令语法,比如是否通过–name指定集群名称等。 pcs –version获取到版本信息,此次使用的是0.10.4 |
pcs cluster setup –force nfs-cluster supos-nfs1 addr=192.168.31.201 supos-nfs2 addr=192.168.31.202
此处使用的pcs,在setup命令后面的紧接的是集群名,老版本是通过–name指定的。大致格式如下
pcs cluster setup <cluster_name> <node_1_hostname> addr=<node_1_IP> <node_2_hostname> addr=<node_2_IP>
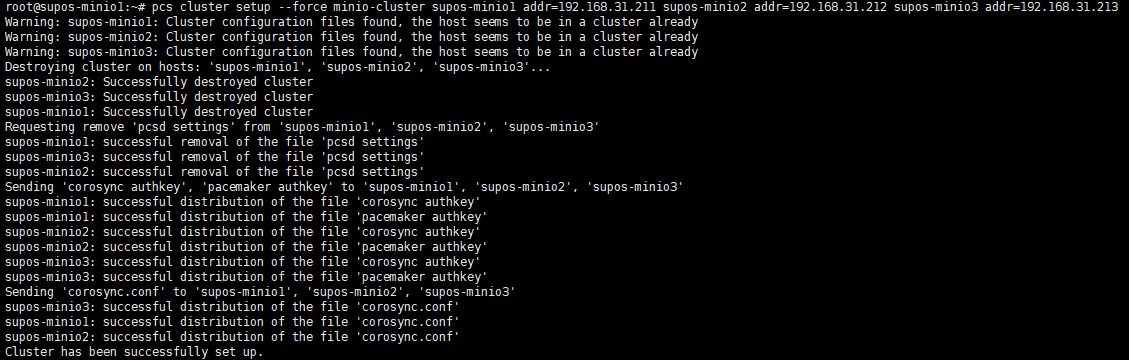
| 如果遇到下图无法解析known-hosts文件的报错,可以尝试pcs cluster destroy命令,然后再创建集群 |

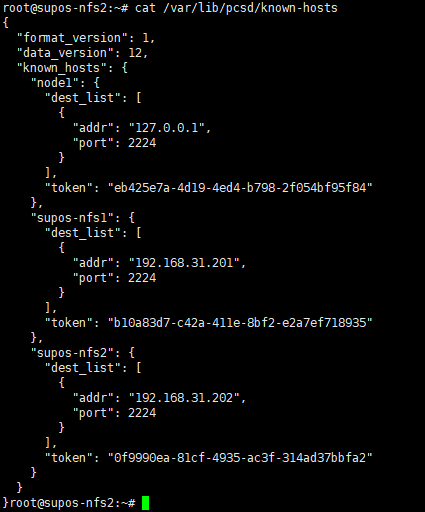
如果集群被正确组建,那么在其他节点上可以看到同步过来的/etc/corosync/corosync.conf和/var/lib/pcsd/known-hosts
内容应该如下,包含了所有node信息

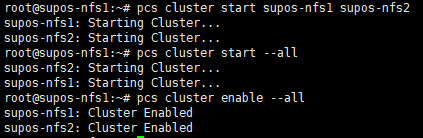
9. 在一个节点上启动集群内所有节点
pcs cluster start –all
并设置服务开机自启
pcs cluster enable –all
10. 检查集群状态
pcs status
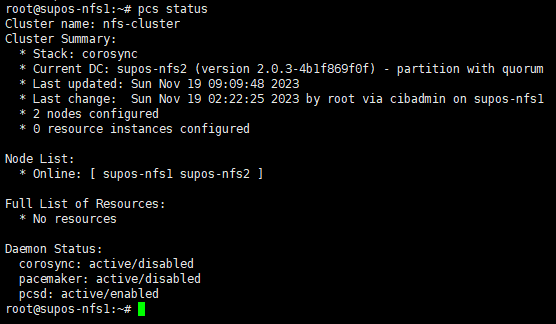
Node List中,所有节点均应处于Online状态
11. 设置集群属性(具体作用未知,待研究)
pcs property set stonith-enabled=false
pcs property set no-quorum-policy=ignore
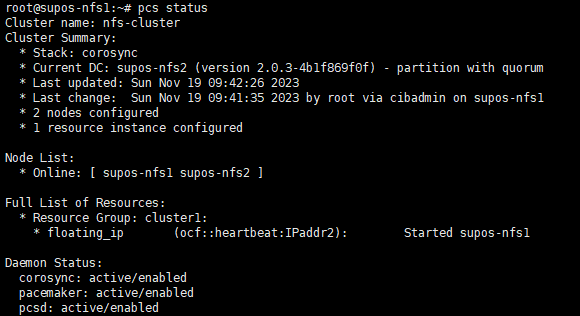
12. 创建IPaddr2类型的浮动IP资源
pcs resource create floating_ip ocf:heartbeat:IPaddr2 ip=192.168.31.200 cidr_netmask=24 op monitor interval=10s
13. 将资源绑定到nfs-cluster
crm configure group nfs-cluster floating_ip
pcs status resources查看
此时,应该可以在一台上看到此浮动IP。执行ip -4 addr 可以看到192.168.31.200的IP地址。
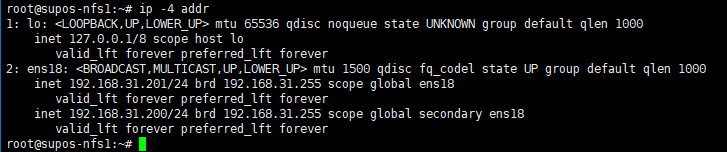
测试资源(VIP)是否可以成功漂移到其他节点
pcs resource move floating_ip supos-nfs2
Post a Comment